
FAQ about HABS HAER and HALS
©2025 by Stephen Schafer
Frequently Asked Questions about Historic American Buildings Survey, Historic American Engineering Record, and Historic American Landscapes Survey (and HABS-Like CEQA) photography and the documentation of historic architecture, engineering and landscapes.
Speedread: WHAT IS HABS HAER & HALS PHOTOGRAPHY IN A NUTSHELL?
• These programs are administered by the Heritage Documentation Programs Department of the National Park Service (HDP and NPS).
• These programs document America's historic built environment and cultural landscapes through architectural drawings, historic reports and photographs which are archived and available for public use at the Library of Congress (LoC).
• HABS, HAER and HALS are considered the gold standard of photographic historical documentation programs.
• Photographic documentation for these programs meets the Secretary of the Interior’s Guidelines for Architectural, Engineering and Landscape Documentation (SIS Doc Guidelines).
WHAT IS HABS (the Historic American Buildings Survey)?
The Historic American Buildings Survey (HABS) is a combination of exemplars. HABS is the Gold Standard for recording American architecture and built heritage and the longest-running preservation program in the United States, established in 1933. HABS is a uniquely American program documenting the finest and oldest buildings in the USA, some owned by presidents, and some built by American pioneers. HABS documents significant buildings, while the Historic American Engineering Record (HAER) records engineering accomplishments from steel mills to bridges to the historic Space Shuttle program. The Historic American Landscapes Survey (HALS) documents significant American landscapes like battlefields, monuments and cemeteries. The HABS, HAER and HALS collections record over 45,000 sites in the USA and are archived at the Library of Congress. All of the reports, drawings and photographs in the HABS, HAER, HALS collections are in the public domain and available to download at the Library of Congress' Prints and Photographs website. HABS, HAER and HALS documentations are the most downloaded items at the Library of Congress – especially popular with kindergarten through twelfth grade students. Some locations recorded for HABS, HAER, and HALS are outside the United States, like the HALS of World War Two American Veterans Cemeteries in France and the HAER of the Panama Canal.
IS FILM STILL REQUIRED IN 2025?
Yes, large format, black and white film is still the only media that meets the Secretary of the Interior's Guidelines and the photography guidelines for the HABS, HAER and HALS (H3) program.
Photographs from digital cameras (known as BORN-DIGITAL) do not yet meet the Secretary of the Interior’s Standards which require large format film. The issue isn't sufficient megapixels, there are complex issues including data transmittal, digital asset management of the files, file format archivability, compression, color bit-depth, and perspective correction and data manipulation guidelines that need to be established. Born-digital parameters are currently being codified by NPS and the LoC.
Born-digital is coming soon, Heritage Documentation Programs (HDP) is currently alpha-testing the technology with a Phase One IQ4 150 Trichromatic Back on a Arca-Swiss F-Line Universalis. However, for contractors and independent photographers doing commissioned work for NPS review or mitigation, analog large format film photography is currently the only way to meet the Secretary of the Interior's Documentation Guidelines. Read more about Born-Digital HABS photography in this 2023 update: Born-digital-habs-in-2023 Link
Many historic preservation mitigation requirements, for instance NEPA, Section 106 of the National Historic Preservation Act of 1966 (NHPA) and the California Environmental Quality Act (CEQA; EIRs, MNDs), reference the H3 guidelines specifically, and therefore they must be recorded on archival, large format film and be transmitted to the LoC to comply.
BLACK AND WHITE… WHY NOT COLOR?
All three programs, HABS/HAER/HALS (H3), require photographs be taken on black & white film. The technical requirement is: Silver-halide on a polyester base (similar to Ilford HP-5 or Kodak Tri-X).
If properly washed, this film is considered archival and resists fading resulting in a predicted Life Expectancy of 500 years (LE500) or more under proper storage conditions. Color film uses dyes and does not meet the LE500 requirement. Some resources that have colorful character defining features and many HALS landscape documentations may require both black and white and duplicate views on color transparency film. Additionally color digital images of the resource are often included in the field-notes (field notes are not required to meet the LE500 standard).
WHAT DOES LARGE FORMAT REFER TO?
Large format photography is captured by cameras that are capable of exposing large sheets of film that are a minimum of 4 x 5 inches. 5 x 7 inch or 8 x 10 inch cameras are also common large format sizes. 5x7 has historically been the preferred format for HABS/HAER/HALS documentation used by in-house NPS photographers at Heritage Documentation Programs in Washington, D.C.
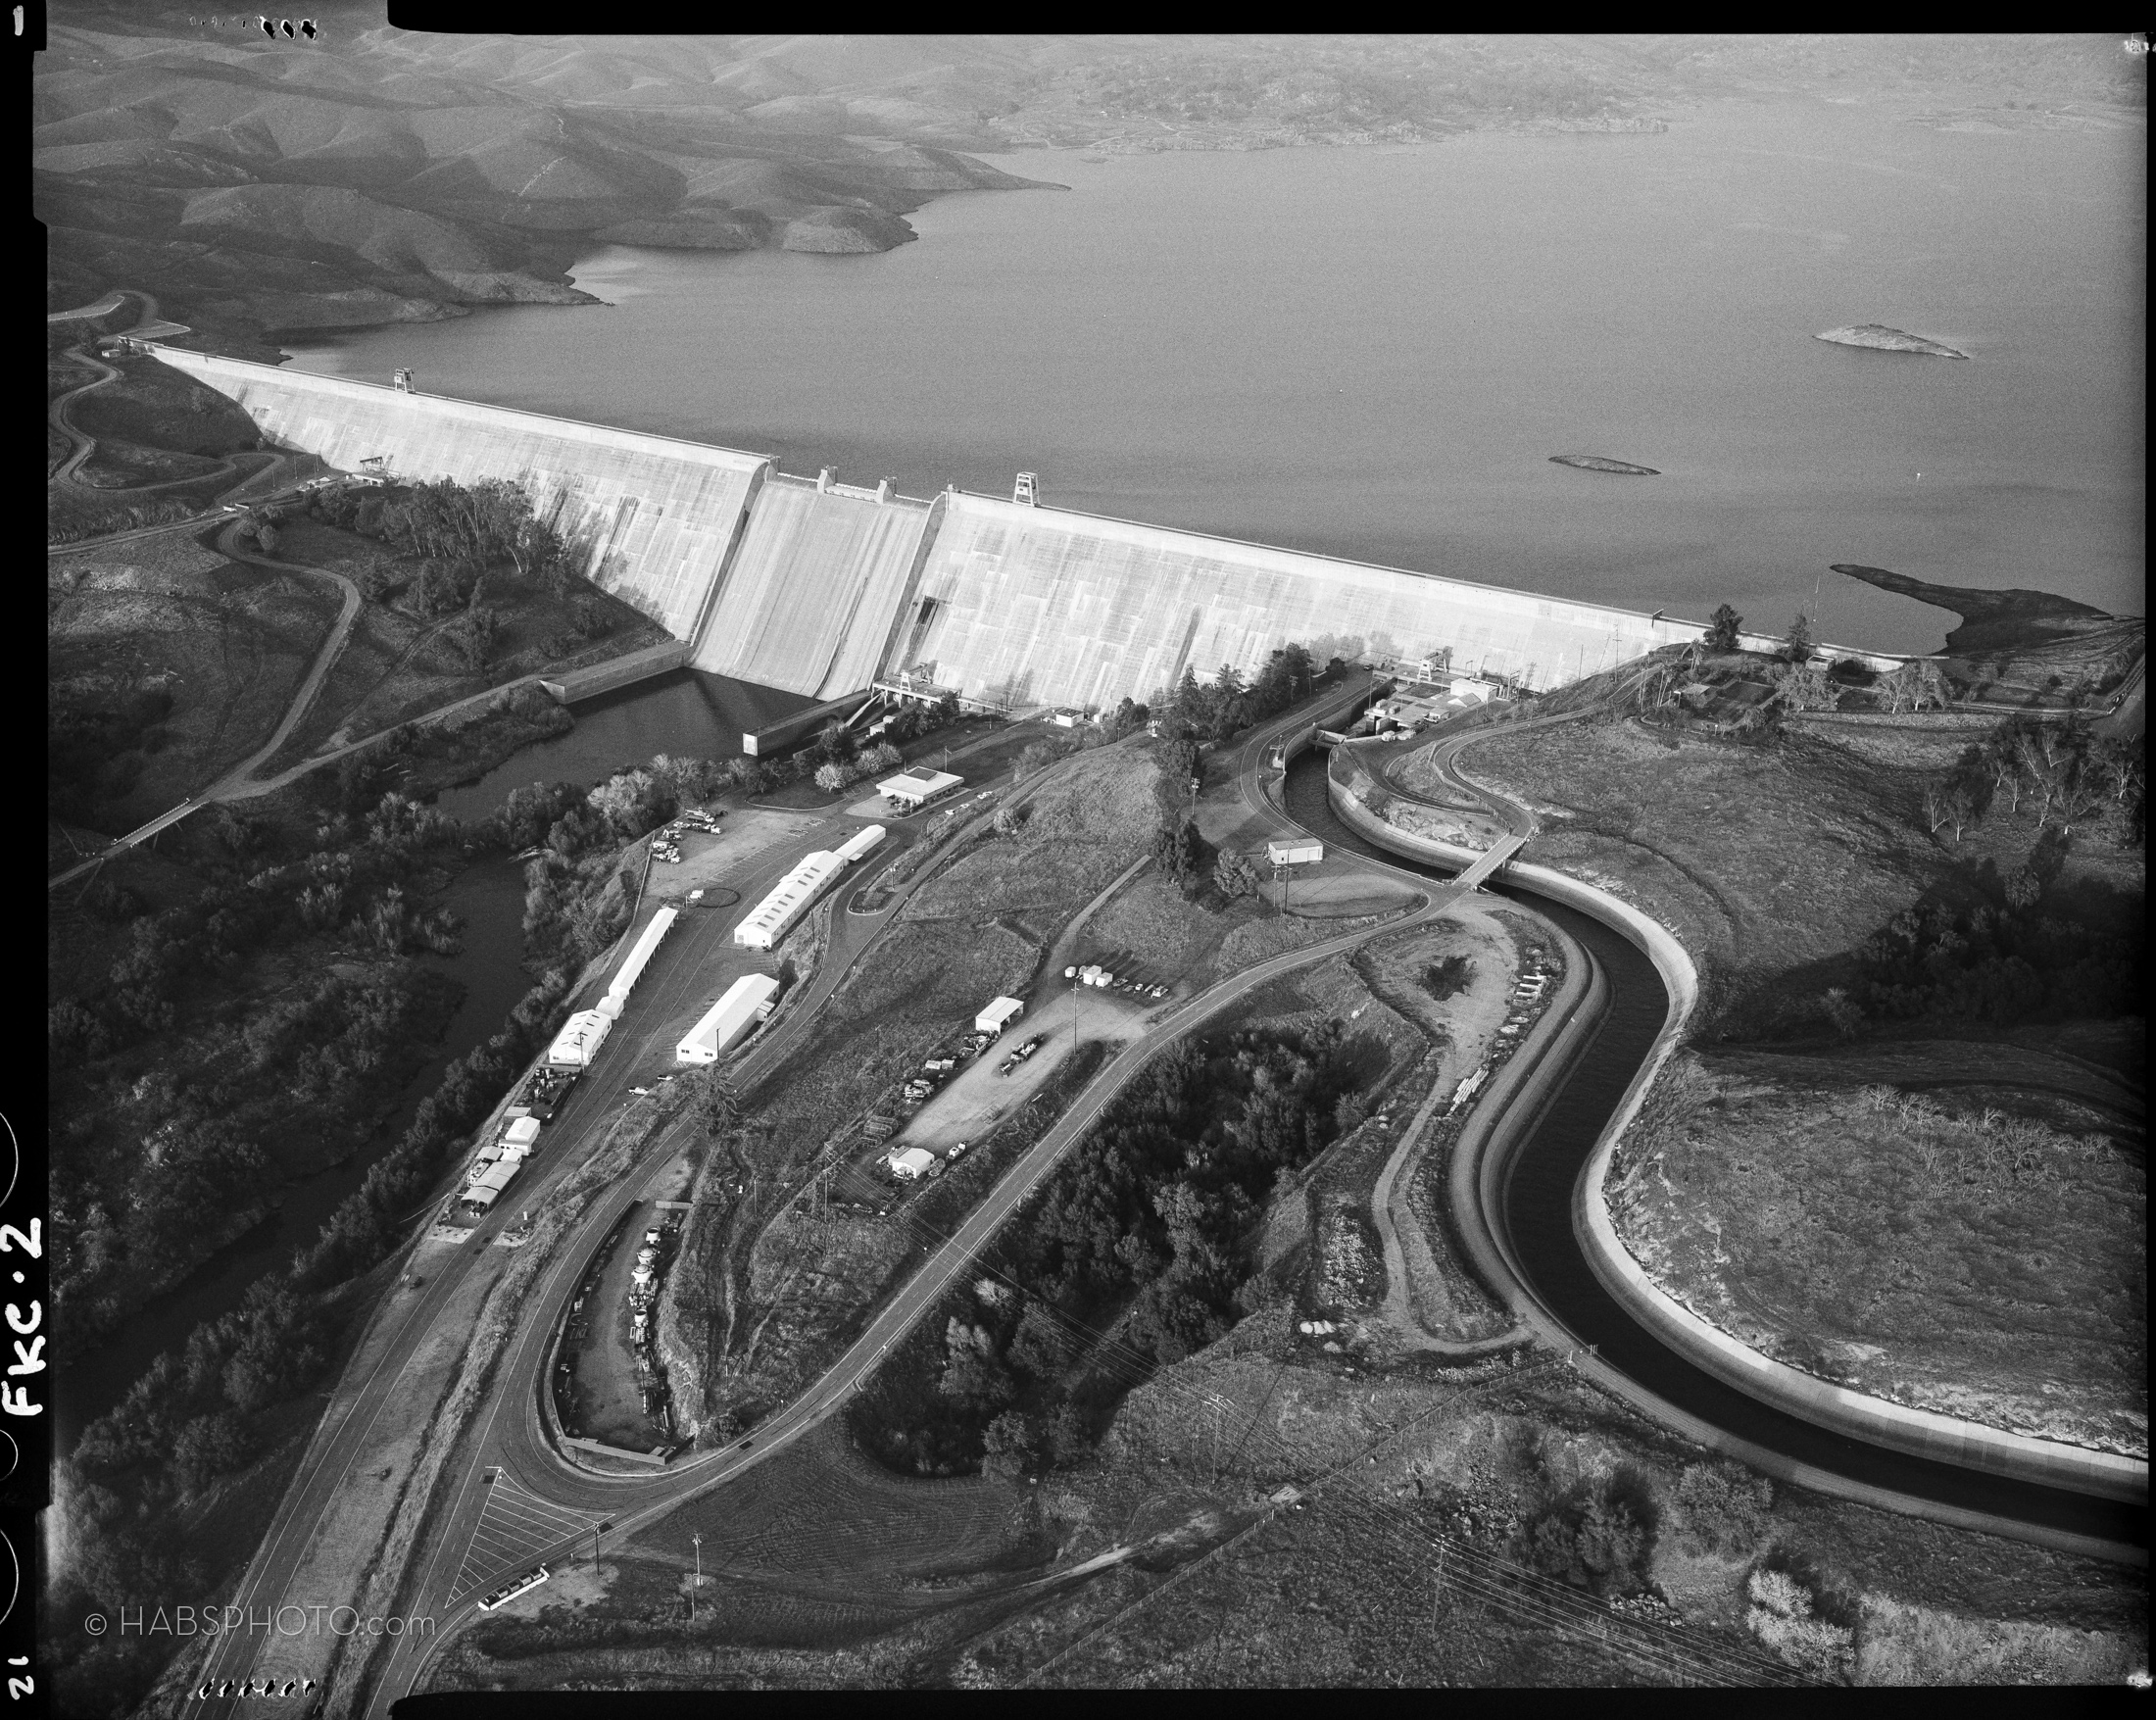
Very important resources like the Golden Gate Bridge and the Statue of Liberty were recorded on 5x7 film. Large Format aerial photos are typically made with 4x5 cameras because they can be hand-held in aircraft. 8x10 cameras are often used for studio copy-views of historic photos, blueprints and maps but are rarely used in the field because they are generally too heavy and cumbersome for extensive location photography projects.
WHY IS LARGE FORMAT REQUIRED FOR HABS?

Quality, Consistency, and Life Expectancy.
The long answer is a bit more wonky… The National Historic Preservation Act of 1966, [as amended, now codified in various sections of subtitle III of Title 54 U.S.C.] requires documentations meet the Secretary of the Interior’s Guidelines for Architectural and Engineering Documentation. [48 Fed. Reg. 44,716 (1983)]. The “Guidelines” require large format film photography because it is durable, archival and records maximum data. The National Park Service and Library of Congress (LoC) have systems and collections in place for archiving and disseminating the large format images to the public making them accessible on the internet.
Because the HABS documentation guidelines and specifications are the best practices for photographic documentation, state and regional programs often use the HABS standards. In California, CEQA and many local municipal ordinances have adopted the HABS guidelines, requiring large format photography. If historic resources are impacted by new projects, demolition or alteration, there is often a requirement to document the historic property by following the HABS\HAER\HALS recording guidelines (which means the Secretary of the Interior's Guidelines).
WHAT 3 THINGS CONSTITUTE A QUALITY DOCUMENTATION?
Documentations that meet the intent of the Guidelines have three main elements:
2.) The film negatives, archival prints, report, measured drawings and captions must all be created on archival materials, and the film shall be processed to archival standards to insure of 500+ year Life Expectancy (LE500).
3.) In order to truly be a public benefit, the photos and report must be accessible to the public. This is the reason records are sent to the Library of Congress and the reason the HABS/HAER/HALS online collection is one of the most popular. (It receives nearly 50,000 visitors a month.) In order for 3H records to indeed mitigate impacts they must be in the public domain (uncopyrighted) and accessible to provide architects, engineers, students, scholars, preservationists, publishers, and interested members of the public with information on the historical, technological, and cultural significance of America's historic resources.
The only way to meet the Guidelines is through a process that insures that the photographs, reports and/or drawings are transmitted to Preservation Documentation Programs (HDP) of the National Park Service. HDP will then transmit the documentation to the Library of Congress for scanning and public dissemination. When donation to the NPS/LoC is not possible, it is imperative that the documentation be 1. maximum-data, 2. archival and 3. public. Local museums, archives or libraries might serve purpose #3, though not with the reach and storage ability of the LoC. Archives selected to receive a mitigation project need to be able to handle the records easily, be publicly accessible and actually used by the public. A documentation/mitigation that ends up on a shelf in city hall, a secure military library or damp basement archive, accessible only by secret handshake, fails at providing public benefit of any kind.
WHAT IS “HABS-Like", “HAER-Like" & “HALS-Like" PHOTOGRAPHY?
HABS-Style, HAER-Like and Diet-HALS (H3-Like) are made-up terms, and as such, they require definition on a case by case basis. In our experience, these parameters are an attempt to establish a lower-quality record than official HABS/HAER/HALS documentations. There is no formal definition for HALS-Like or HAER-ISH or Diet-HABS because the consultants writing the mitigation – not the NPS – are making up new rules.
In our experience "HABS-Like" usually means that H3 guidelines for recording, content and deliverables are followed closely but the finished documents (prints and negatives) may not be submitted to the Library of Congress (This can be an expensive mistake**).
In other situations however, the mitigation intent of HABS-Like documentations is overshadowed by financial implications and the documentation photos, drawings and reports are marginalized without a meaningful quality standard, distributed locally only, no archival materials are delivered, or records are made without a requirement for max-data, archivability and/or access. In California, some of the substandard mitigations we have worked on were triggered by CEQA to mitigate impacts in Environmental Impact Reports (EIRs) or Mitigated Negative Declarations (MNDs). While HABS-Like documents were required by a local lead-agency, they did not meet the mitigation requirements on the Secretary’s Guidelines for Architectural and Engineering Documentation, and often they were delivered on color prints or digital media like CD-Rs that were misplaced or were unreadable a decade later or the photographer claimed copyright to the photos making them unusable for the public. In state or local H3-like documents, it is important to put the photographs in the public domain and make copies of the report available to the public in multiple, accessible locations.
Note: Until official HABS/HAER/HALS numbers are assigned by NPS through donation or by the Regional NPS Office for mitigation review, they are not real HABS, HAER or HALS documentations. To avoid confusion, DO NOT PUT HABS CA-XXXX on the records if they are not transmitted to the LoC. Local records should never have the acronyms HABS, HAER or HALS printed anywhere on the record or photos or have a HABS, HAER, or HALS number that implies that the records are archived at the to LoC.
DO I NEED TO DEMOLISH THE BUILDING AFTER I DO A HABS? No.
HOW MANY PICTURES DO YOU NEED FOR A TYPICAL HABS/HAER/HALS PHOTO PROJECT?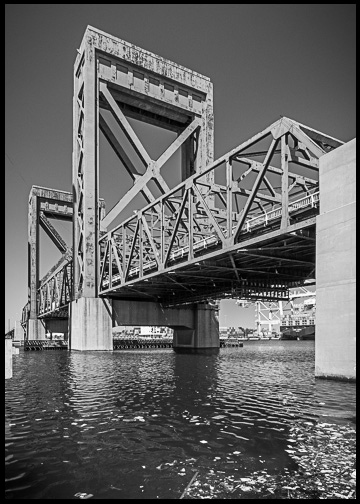
Establishing the right number of field views is always a complex question. The answer is as diverse as the American heritage we document. It comes down to significance, budgets, time, access, motivations, lawsuits, insurance, etc. If the building is a little garage in a historic district, then two views may be sufficient. If that garage is the "HP Garage" birthplace of the Silicon Valley, then it would likely warrant more views. For example, what about demolition of Heim Bridge in Long Beach, the largest lift-span bridge in the Western United States? 11 views? 39 views? 74? Or 113?
In complex recording projects, the scope needs to be informed by the size of the resource, its context, its complexity and its significance. In the Heim Bridge example, forty HAER field-photos were taken in the field, forty copies were made of original engineering drawings to explicate the bridge's engineering significance. Without access to the historic blueprints and plans, many more detailed field view photographs of the bridge would have been warranted.
How was that quantity determined? Scouting, asking a lot of questions and working with an architectural historian to analyze the bridge's significance and character defining features. There is no simple guideline, but working with a preservation expert and an experienced HABS/HAER/HALS photographer can help with complex scoping. The intent is to tell a complete story about the resource, which may mean interiors, context, landscape, details and possibly even aerials if the resource is a large district or property. However the documentation should not be excessive, punitive or disproportionate to the significance of the resource.
HOW MANY DELIVERABLE COPIES ARE PRODUCED FOR A TYPICAL HABS/HAER/HALS SURVEY?

Two or more usually. If the documentation package is formally reviewed by the National Park Service (NPS) Regional Office for transmittal to the Library of Congress, then customarily 1 set of negatives and 2 sets of prints are delivered. Often additional copies are requested by the lead-agency, the State Historic Preservation Officer (SHPO), consulting parties or the Advisory Council on Historic Preservation (ACHP) to fulfill local mitigation obligations or conditions. Local museums are typical recipients of documentation reports. Often libraries, historic societies, state museums, universities, the State Historic Preservation Office (SHPO) and even advocacy groups are listed to receive copies of records.
It again comes down to significance. If the building is the "HP Garage," birthplace of the Silicon Valley, its regional importance could warrant duplicate copies in every library in the Silicon Valley. State and local H3-Like documentations require one or more sets of negatives and multiple print-only copies be delivered to archives such as state or regional museums, historic societies, university libraries and regional information centers. Because the negatives and prints are expensive to produce, original copies may not be warranted for all archives, especially if the negatives are transmitted to the LoC. Archival laser-copies or a DVD of digital scans may be sufficient duplicate records for historic societies, local libraries. Planning departments may only need a digital copy and proof of transmittal to NPS to sign off on the mitigation because they probably are not able to store negatives or prints in archival conditions. It might seem that uploading reports and images to the web would be much easier but the necessity of maintaining a website, links and hosting digital documents in perpetuity makes printed copies more reliable. (Have you ever been linked to a 404 website that didn't exist?)
** IS THERE A WAY TO DO HABS-Like DOCUMENTATION FOR LESS?
 HABS, HAER and HALS negatives, drawings and written histories are scanned and made keyword searchable. They are made available on the LoC website 24/7/365. The negatives are archived to achieve a 500-year life expectancy in secure, temperature- and humidity-controlled conditions at Fort Meade in Maryland.
– That sure is a perfectly stored, and publicly accessible document!
It may seem counterintuitive, but you can save time and money on local mitigations if the final records meet the 3H guidelines and the documentation is donated to the 3H collections. No costly duplicates are required. No NPS regional office review is required. No contacting, mailing and chasing down acceptance forms from local libraries, historic societies and museums. If your record meets H3 guidelines, then making multiple sets of it will cost more than making one set for donation. To donate a record to NPS, see this HOW-TO on my HABS MADE BETTER & CHEAPER page.
HOW TO HIRE A HABS, HAER or HALS PHOTOGRAPHER.
Large documentation projects can be quoted directly by phone or RFP. It is advisable to consult a professional familiar with Historic surveys (architectural historian, preservation planner, photographer) to help with the scope of a RFP. The sixteen most important questions to answer when contracting H3 surveys are listed here:
1. Number of HABS/HAER/HALS views required?
2. Is one set going to the Library of Congress as a donation or through NPS review?
3. What format: archival large format film (4x5, 5x7), digital, or other?
4. How many sets of film negatives per view?
5. How many archival mount card print sets are needed for distribution?
6. Are duplicate color digital views required for each B&W film view?
7. Who is creating the final HABS captions and Photo Index and key maps (photographer or client)?
8. What people or agencies are reviewing the drafts?
9. What is the underlying project that requires documentation?
10. Is there a specific MMP, MOA, EIR mitigation, or condition of approval that the documentation must fulfill?
11. Daylight hours of access permitted?
12. Access issues: dirt roads, boats, boarded windows, stairs, locked access gates, security clearance or escort required?
13. Known conditions on site: snow, water in creek under bridge, bees, fleas, rats, bats, feral cats, pigeons, poison oak, hostile tenants, crackheads?
14. PPE required Steel-toe boots, hardhats, safety vests (security escort, lift equipment, climbing harnesses, aircraft, breathing masks, hazmat suits?)
15. Electricity available, do elevators work, lights for interiors?
16. Is 4 million enough insurance coverage for the contract?
CAN ANY PHOTOGRAPHER DO HABS/HAER/HALS?
 Yes, the HABS/HAER/HALS photography guidelines can be downloaded from the NPS website. Any photographer with experience using large format cameras and film (4x5 and 5x7 cameras) and familiar with perspective control can do an H3 photo survey. If you want to learn large format photography, 4x5 cameras, can be rented in larger markets like New York, San Francisco and Los Angeles for those wanting to try out the equipment. It should be noted that the requirements for acceptance of records are strict. The guidelines for recording, processing and transmitting HABS/HAER/HALS surveys are available for download (Guidelines Link) and it takes some time to master the field photography workflow, logistics, field notes, maps, darkroom work, archival washing and printing.
We have found that for every day of fieldwork making photographs, there are four additional days of darkroom and post-production required to complete and ship final deliverables. Unfortunately, we have also been called to redo documentations submitted to HDP by inexperienced photographers that were rejected because they did not meet archival specifications. Some photographers may not carry the required insurance or may not wish to sign away their copyright to photographs and release them into the public domain (a copyright release is required with every HABS, HAER and HALS transmittal). Therefore, you may only find a handful of photographers in any region with the desire, training, equipment and experience to deliver a HABS/HAER or HALS survey on time and on budget.
Suggested reading for photographers:
Recording Historic Structures (2nd edition)
A Record in Detail by Jack E. Boucher.
Industrial Eye by Jet Lowe.
A Constructed View by Julius Shulman.
DOES A HABS DOCUMENTATION NEED TO BE PRINTED IN A DARKROOM?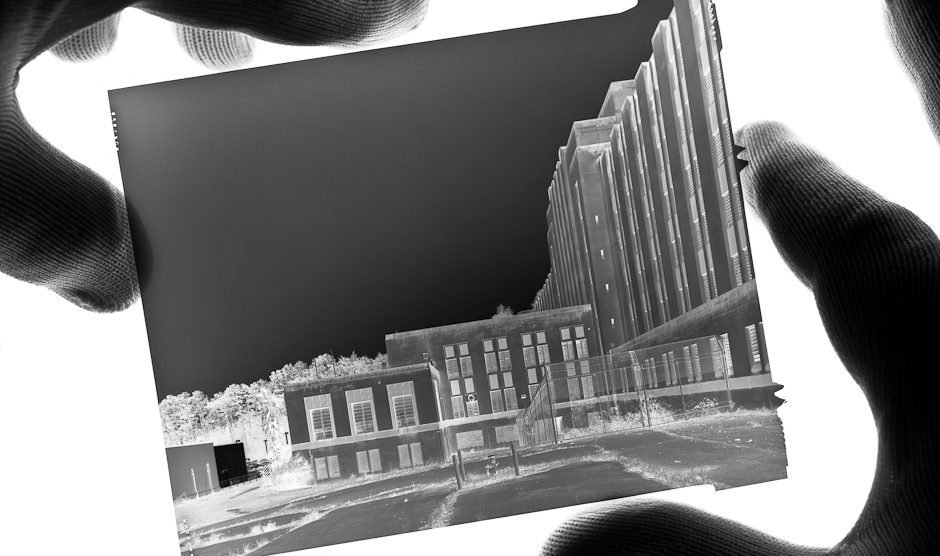
An in-house darkroom can improve turn-around times and keeps the negatives from being shipped off-site for developing and printing, but since June 2015, HABS guidelines have allowed for "Digital Print Cards.”
The resource is still photographed on large-format film and the film processed and archivally washed as before. Then, instead of being contact-printed in a wet darkroom, the negative is scanned and printed on a digital pigment printer using archival inks. This does not generally save time, but it allows photographers without darkrooms to make H3 prints. "HABS Digital Print Cards" may also be a less time consuming way to make large numbers of printed copies for numerous museums and libraries.
DOES A SITE NEED TO BE ON THE NATIONAL REGISTER TO BE INCLUDED IN HABS?
Sites do not need to be listed on the National Register of Historic Places or be landmarks to be documented, but sites recorded for the HABS, HAER, HALS collections should be historically significant, at least locally. The HABS/HAER/HALS collection seeks to record "A Complete Resume of the Builders' Art", including folk and vernacular examples of historic resources and sites that may only be locally significant. In 2017, the Associate Director, Cultural Resources, Partnerships and Science, in a memo [H1817(2270)] to all State and Tribal Historic Preservation Officers, clarified that "…HDP, will accept all documentation of National Register and National Register-eligible properties of national, state, regional or local significance…” So if a building, district, object, structure or site is Local, State or National Register eligible then H3 large format photography would be the proper way to record the site.
EXTRA CREDIT: WHAT MAKES A MORE MEANINGFUL HABS PHOTO MITIGATION?
How to make a good documentation better? Try adding ten or twenty Print On Demand (POD) books of H3 reports, drawings and photographs to the requirements to increase public visibility and accessibility and make your mitigation more of a public benefit. Schaf Photo has created a number of easily distributable H3 Books, and one example is the Lovelace Garden HALS book linked below. The beauty of these inexpensive POD books is they can be printed on demand and distributed to a bunch of local libraries that have a familiarity with storing, shelving and sharing paperback BOOKS, but may not have the facilities or ability to properly store and share delicate negatives, loose archival prints or full size drawings. The printer we use for these books is HP Magcloud because an additional benefit is that every book they print is available perpetually online for free download to a computer or a tablet as an E-Book. Order a book from the Magcloud website and a paperback book will be printed and shipped On-Demand, or just download the book to any phone/tablet anywhere free. Look at samples of complete HABS documentations here and download free digital versions: LINK TO OUR SAMPLE MAGCLOUD BOOKS
In order for a documentation to be meaningful and truly counterbalance an adverse impact it needs to be useful and available. In order to implement meaningful mitigations that are both a public benefit and contain all the information needed for a comprehensive scope, we created some suggested text for a typical HABS/HAER/HALS mitigation as you might find in an EIR or EIS. It is linked here as a PDF, or search the web for "CULTURAL HABS PHOTO MITIGATION." PDF > DOCUMENTATION MITIGATION SAMPLE TEXT
• • • •
STEPHEN SCHAFER ©2025
•